> ## Documentation Index
> Fetch the complete documentation index at: https://help.bilopt.com/llms.txt
> Use this file to discover all available pages before exploring further.

# チュートリアル

export const RelatedLink = ({title, href}) => <div className="text-sm related-links">
    <svg xmlns="http://www.w3.org/2000/svg" width="14" height="14" viewBox="0 0 24 24" fill="none" stroke="currentColor" strokeWidth="2" strokeLinecap="round" strokeLinejoin="round" aria-hidden="true" style={{
  display: "inline-block",
  verticalAlign: "middle",
  marginRight: "0.35em"
}}>
      <path d="M15 2H6a2 2 0 0 0-2 2v16a2 2 0 0 0 2 2h12a2 2 0 0 0 2-2V7Z" />
      <path d="M14 2v4a2 2 0 0 0 2 2h4" />
      <path d="M10 9H8" />
      <path d="M16 13H8" />
      <path d="M16 17H8" />
    </svg>
    <a className="link" href={href}>{title}</a>
  </div>;

<Info>
  プロジェクトの作成から提案資料の出力まで、一連の流れをご紹介します。
</Info>

<iframe className="w-full aspect-video" src="https://www.youtube.com/embed/BRudqSvY_Ks?rel=0" title="はじめてのビルオプト" frameBorder="0" allow="accelerometer; autoplay; clipboard-write; encrypted-media; gyroscope; picture-in-picture" allowFullScreen />

<Steps titleSize="h3">
  <Step title="プロジェクトを作成する">
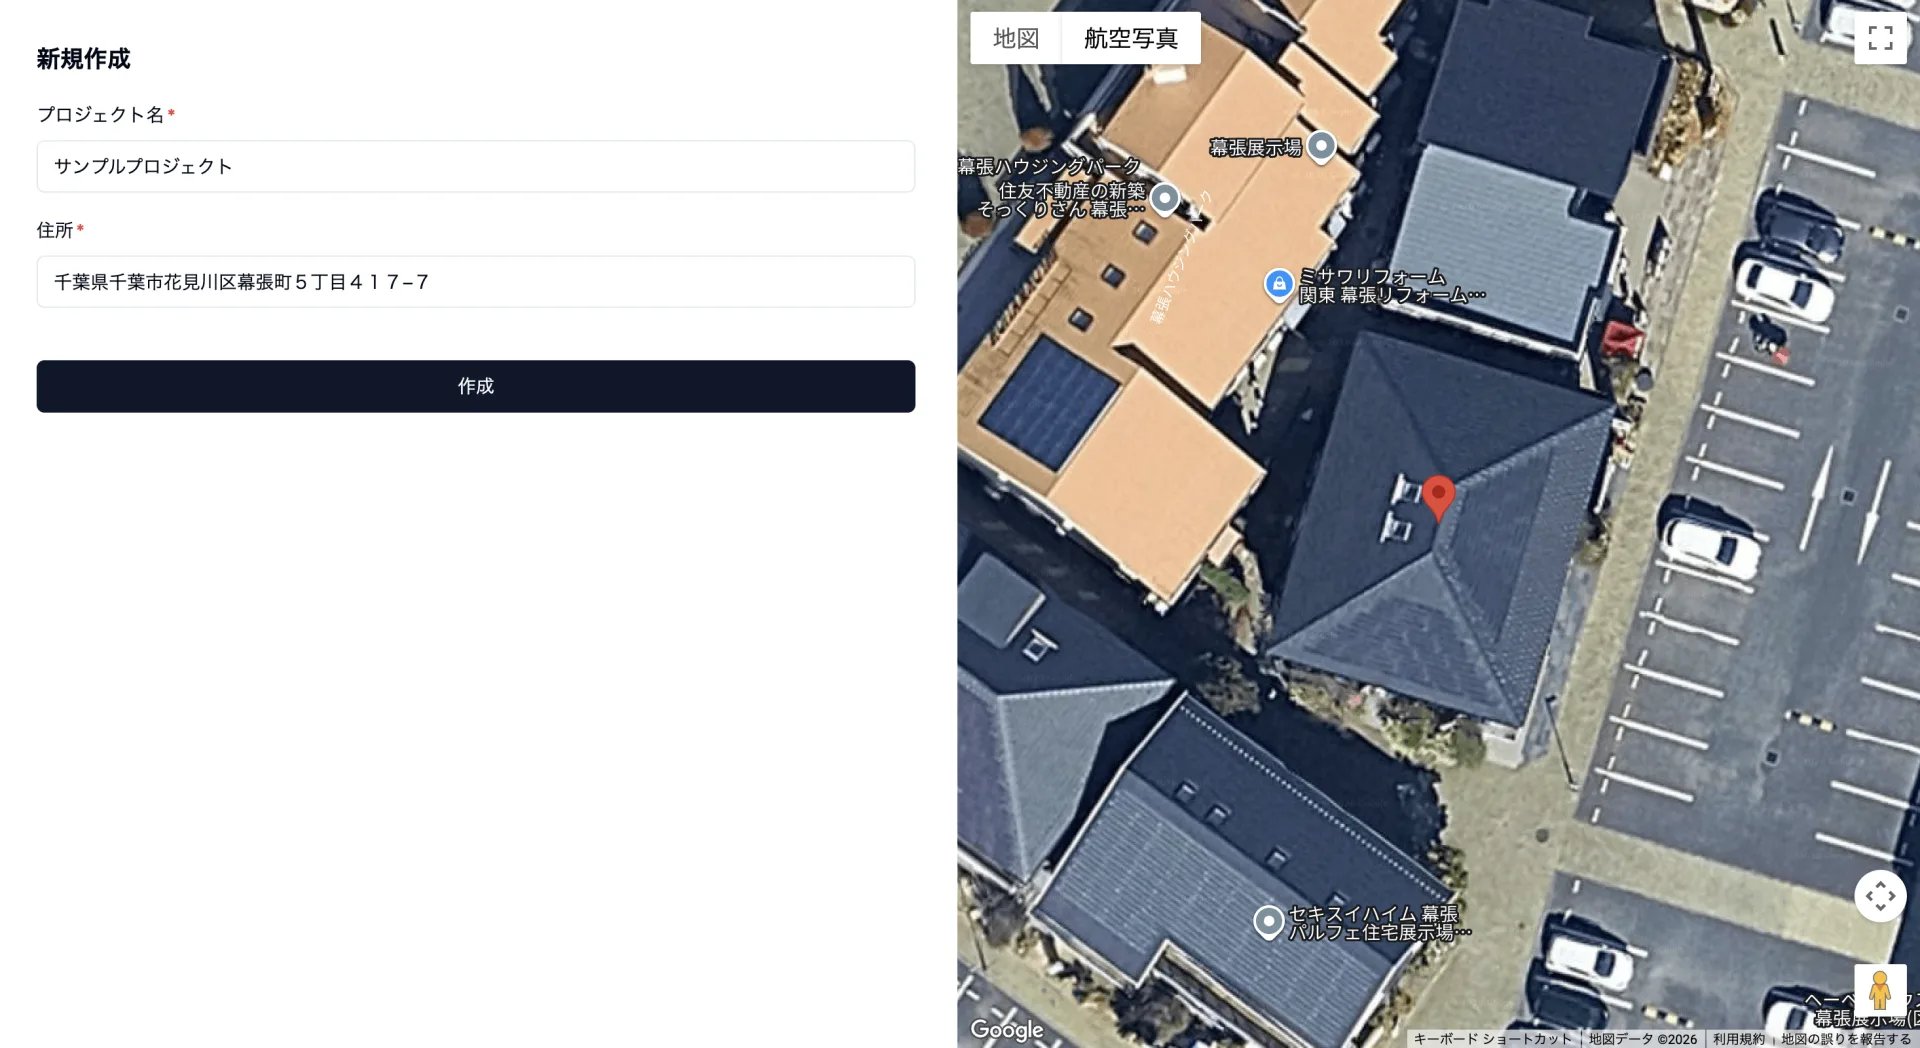
    お客さまごとにプロジェクトを作成します。プロジェクト名と住所を入力し、地図のピンを対象の建物に合わせます。

    <img src="https://mintcdn.com/bilopt/ep8fOEThysbr4EFT/images/help/getting-started/tutorial-01.webp?fit=max&auto=format&n=ep8fOEThysbr4EFT&q=85&s=86da5143b3f789283f6da82edbc04429" alt="プロジェクト名と住所を入力し、地図にピンを表示した新規作成ページ" width="1920" height="1048" data-path="images/help/getting-started/tutorial-01.webp" />

    <RelatedLink title="プロジェクトを作成する" href="/projects/create-project" />
  </Step>

  <Step title="デザインを作成する">
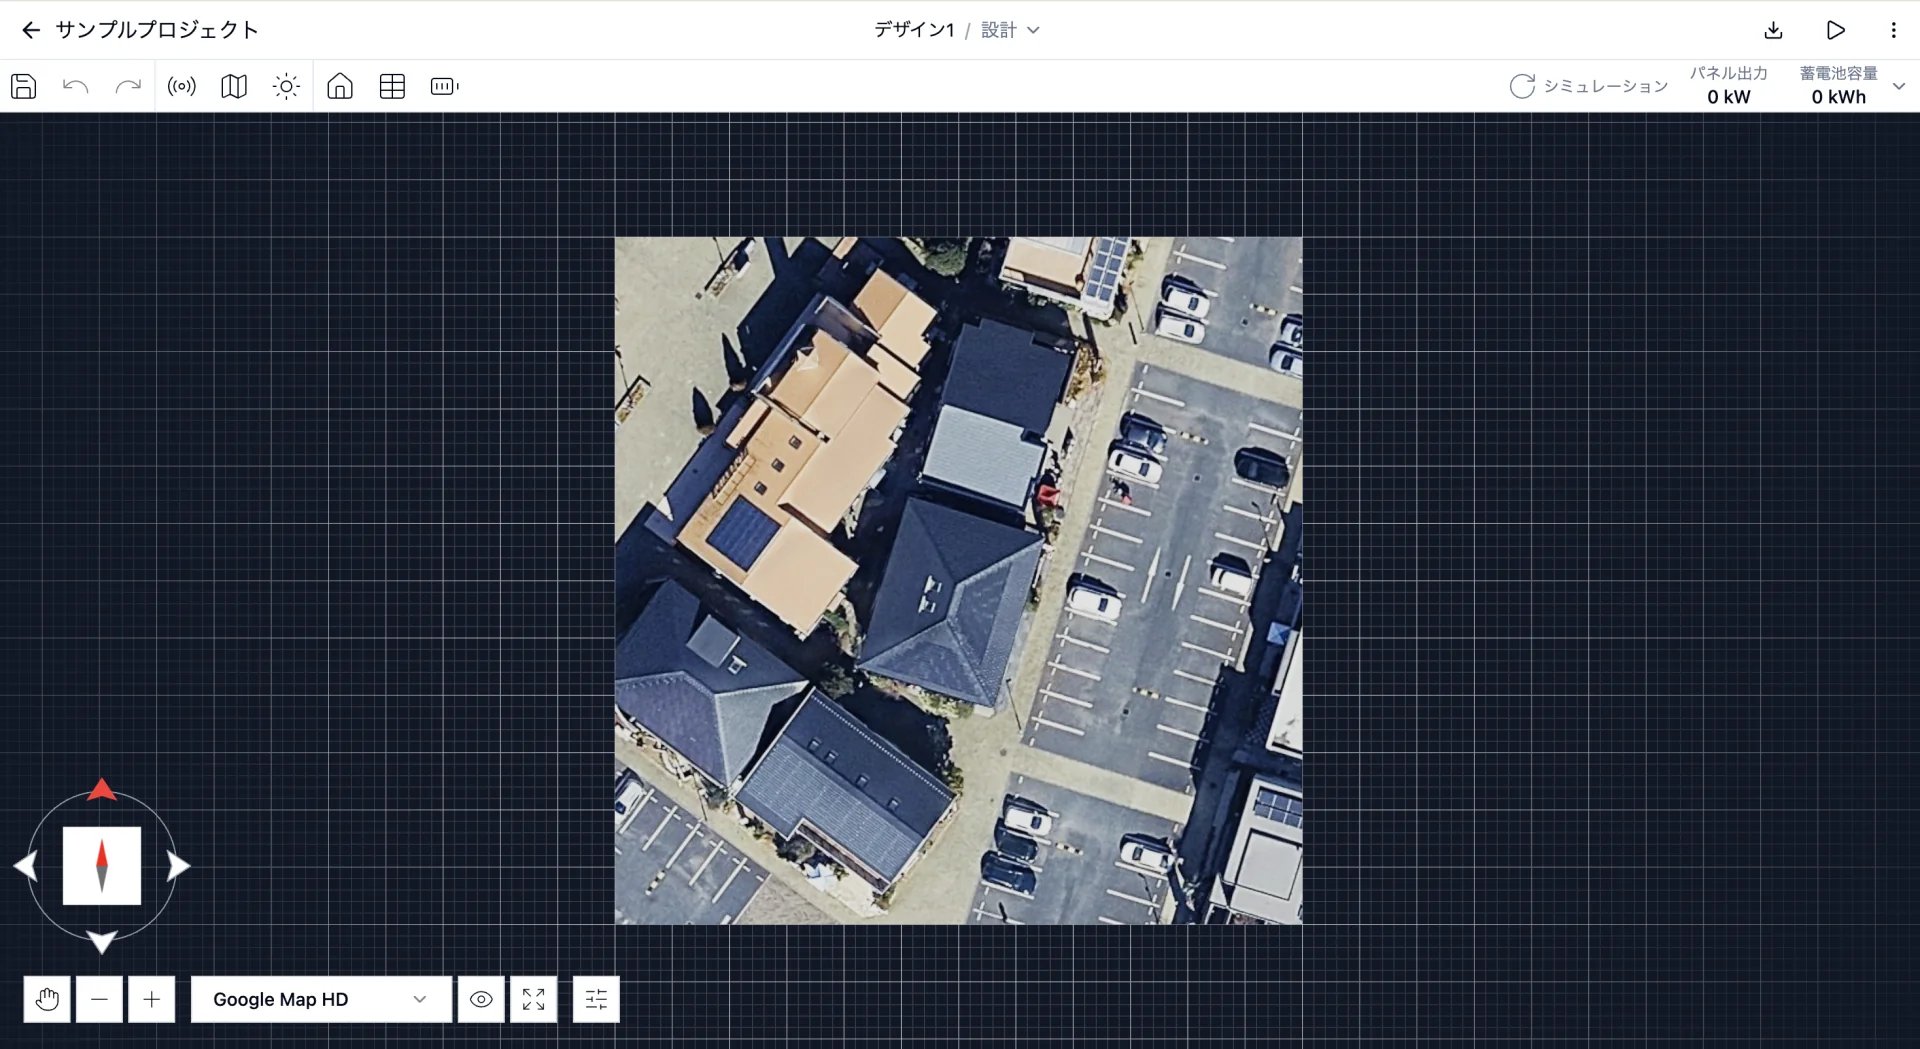
    プロジェクト詳細ページからデザインを作成します。1つのプロジェクトに複数のデザインを作成することが可能です。

    <img src="https://mintcdn.com/bilopt/ep8fOEThysbr4EFT/images/help/getting-started/tutorial-03.webp?fit=max&auto=format&n=ep8fOEThysbr4EFT&q=85&s=73fdd7c7ae63524fe2fba9973382e07b" alt="衛星画像を表示した作成直後のデザインページ" width="1920" height="1049" data-path="images/help/getting-started/tutorial-03.webp" />

    <RelatedLink title="デザインを作成する" href="/design/create-design" />
  </Step>

  <Step title="建物を作成する">
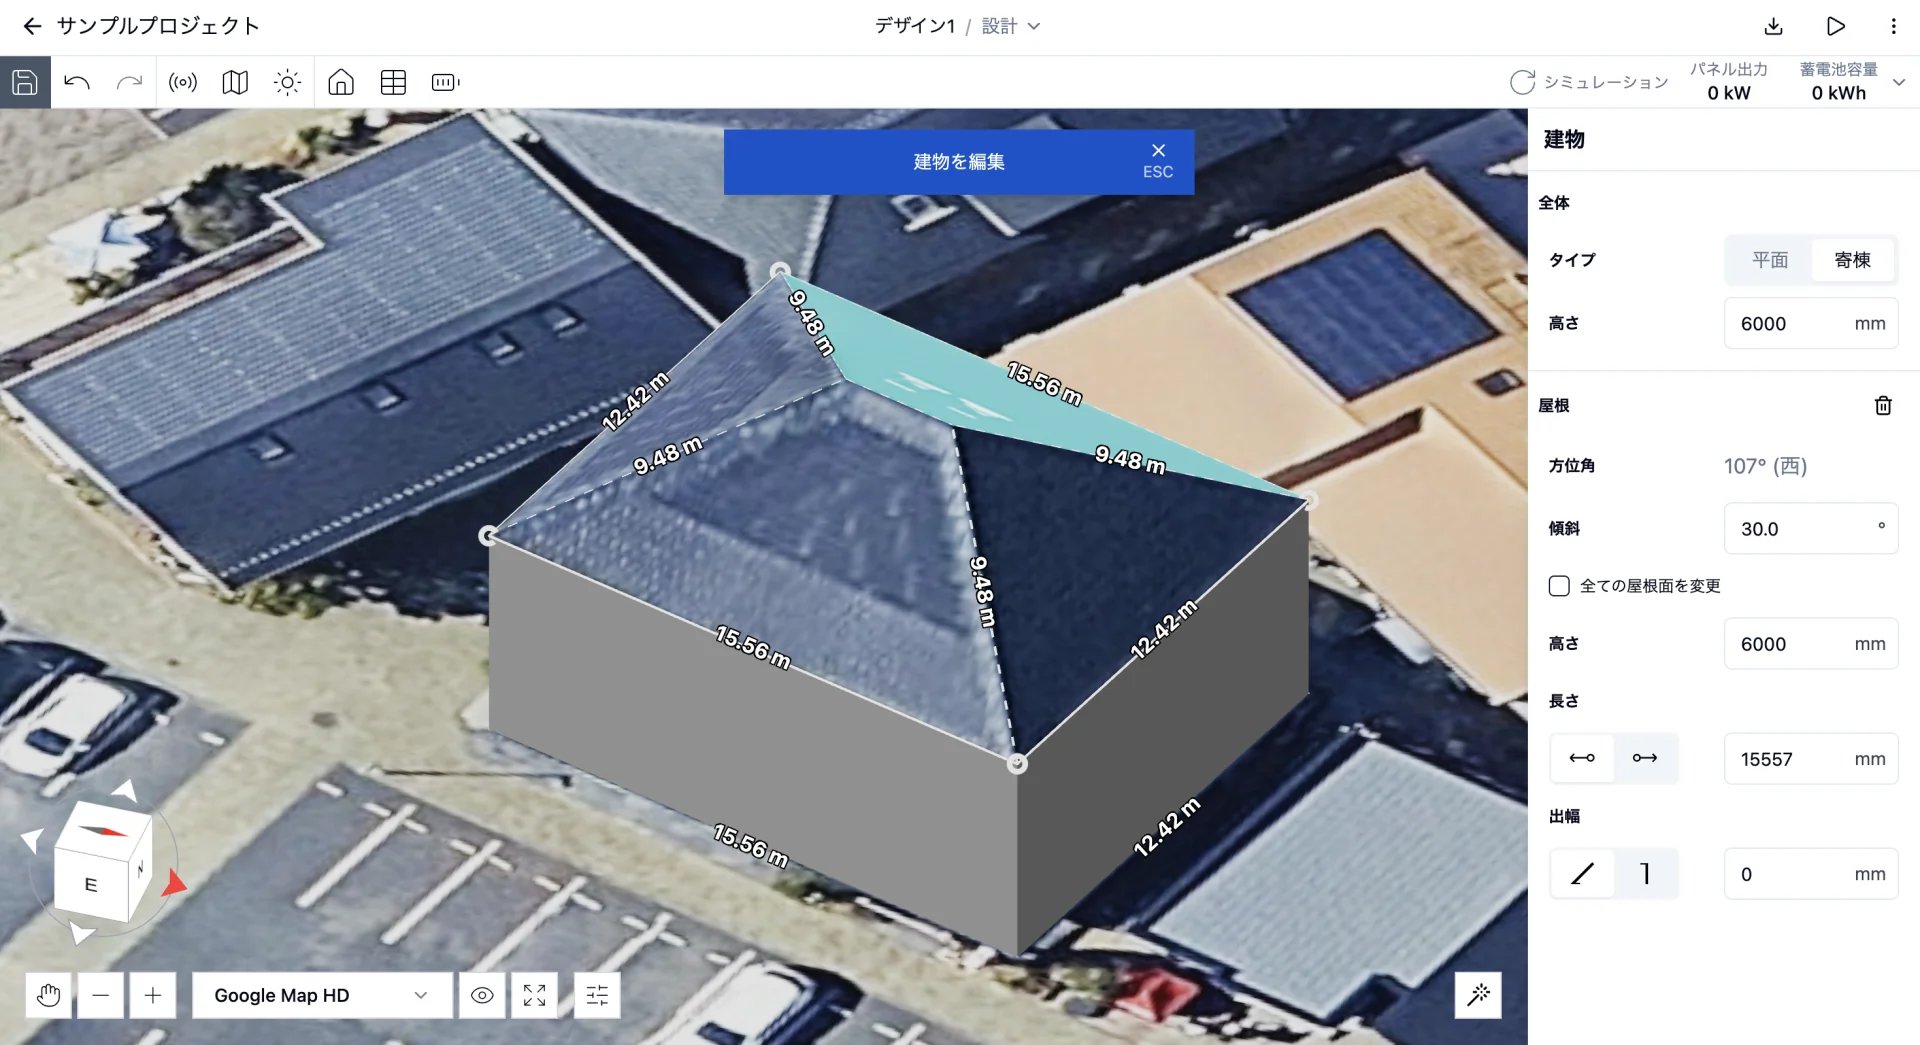
    衛星画像から建物の3Dモデルを作成します。図面がある場合は、図面のアップロードや、外壁線の寸法入力での作図が可能です。

    <img src="https://mintcdn.com/bilopt/ep8fOEThysbr4EFT/images/help/getting-started/tutorial-04.webp?fit=max&auto=format&n=ep8fOEThysbr4EFT&q=85&s=271251787d838804bf646051852840d2" alt="作成した寄棟モデルと編集用サイドパネル" width="1920" height="1045" data-path="images/help/getting-started/tutorial-04.webp" />

    <RelatedLink title="建物を作成する" href="/design/create-building" />

    <RelatedLink title="図面をアップロードする" href="/design/upload-drawings" />

    <RelatedLink title="寸法指定で作図する" href="/design/draw-with-dimensions" />
  </Step>

  <Step title="太陽光パネルを配置する">
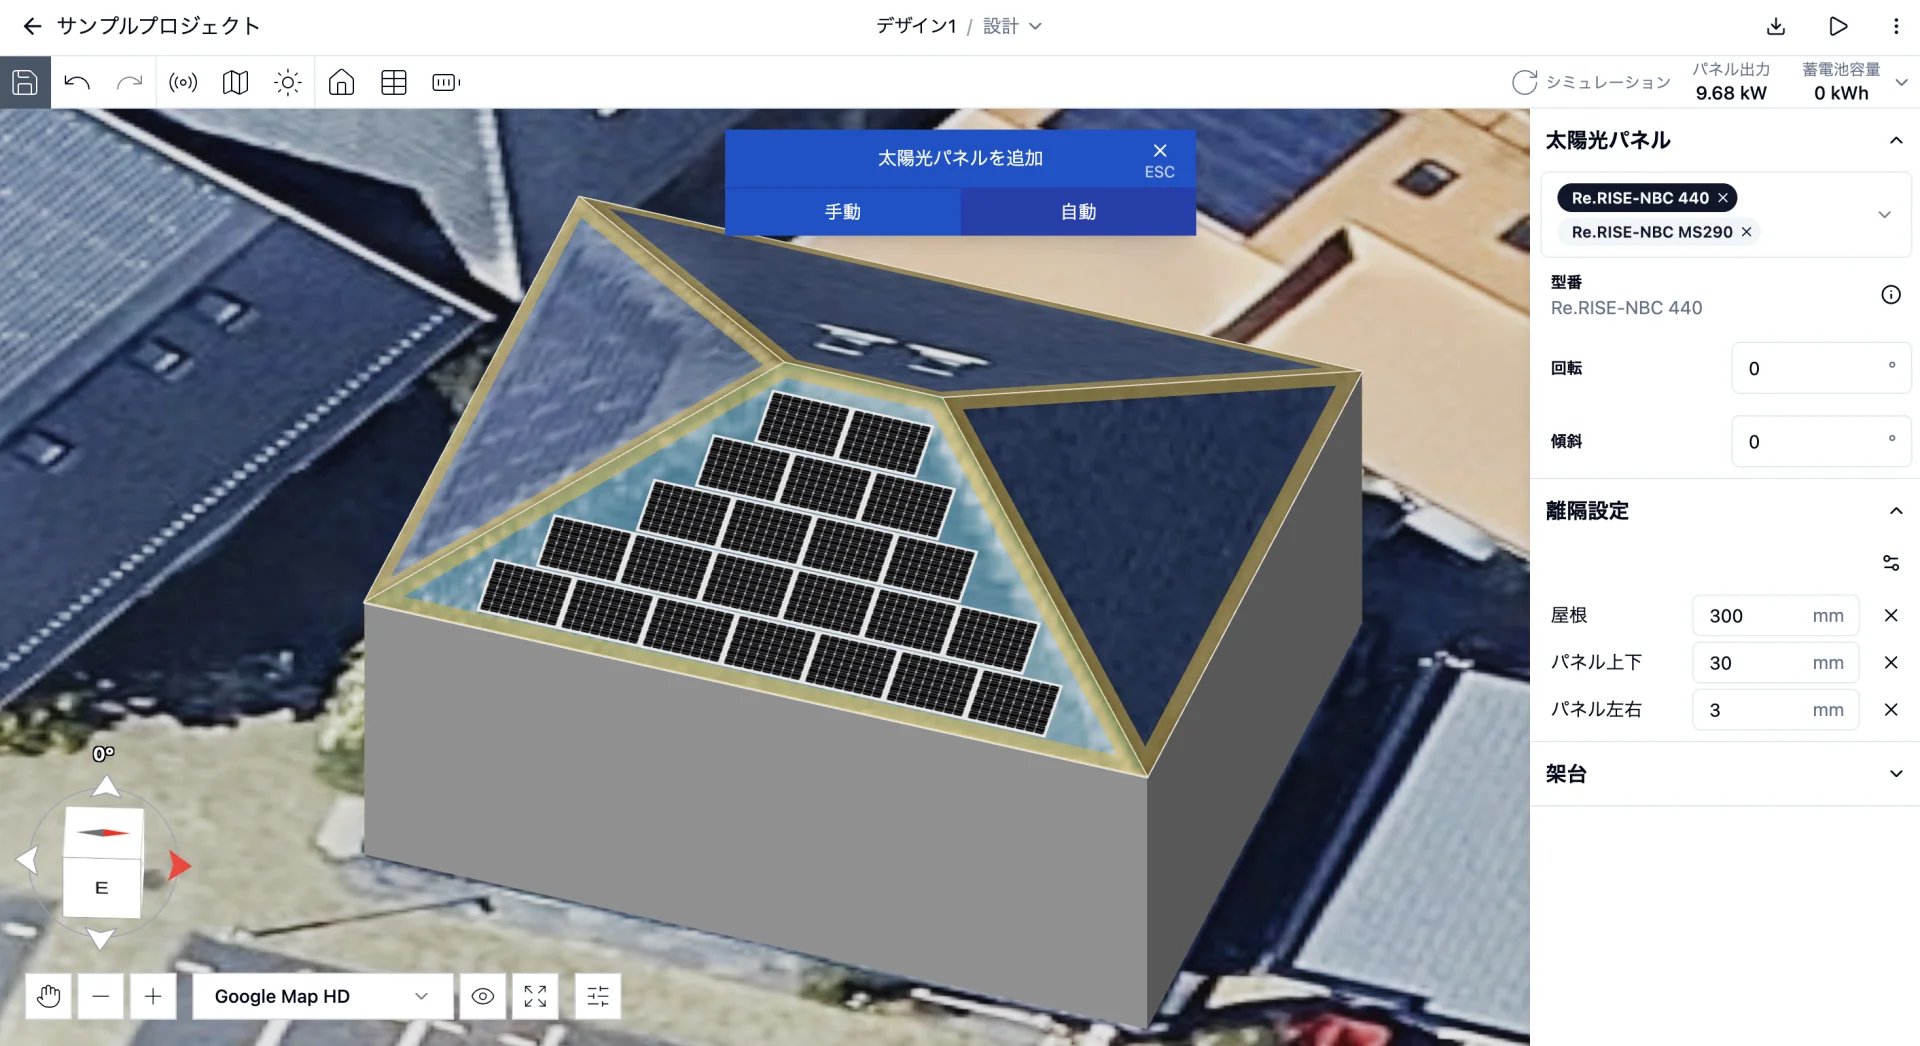
    屋根面をクリックして太陽光パネルを配置します。自動配置では、最大枚数のレイアウトが選択されます。

    <img src="https://mintcdn.com/bilopt/ep8fOEThysbr4EFT/images/help/getting-started/tutorial-05.webp?fit=max&auto=format&n=ep8fOEThysbr4EFT&q=85&s=2099ded68b1406a84b406b58d9f2e5aa" alt="選択した屋根面に太陽光パネルを自動配置した画面" width="1920" height="1046" data-path="images/help/getting-started/tutorial-05.webp" />

    <RelatedLink title="パネルを配置する" href="/design/place-panels" />

    <RelatedLink title="架台を配置する" href="/design/place-mounting-systems" />
  </Step>

  <Step title="蓄電池を選択する">
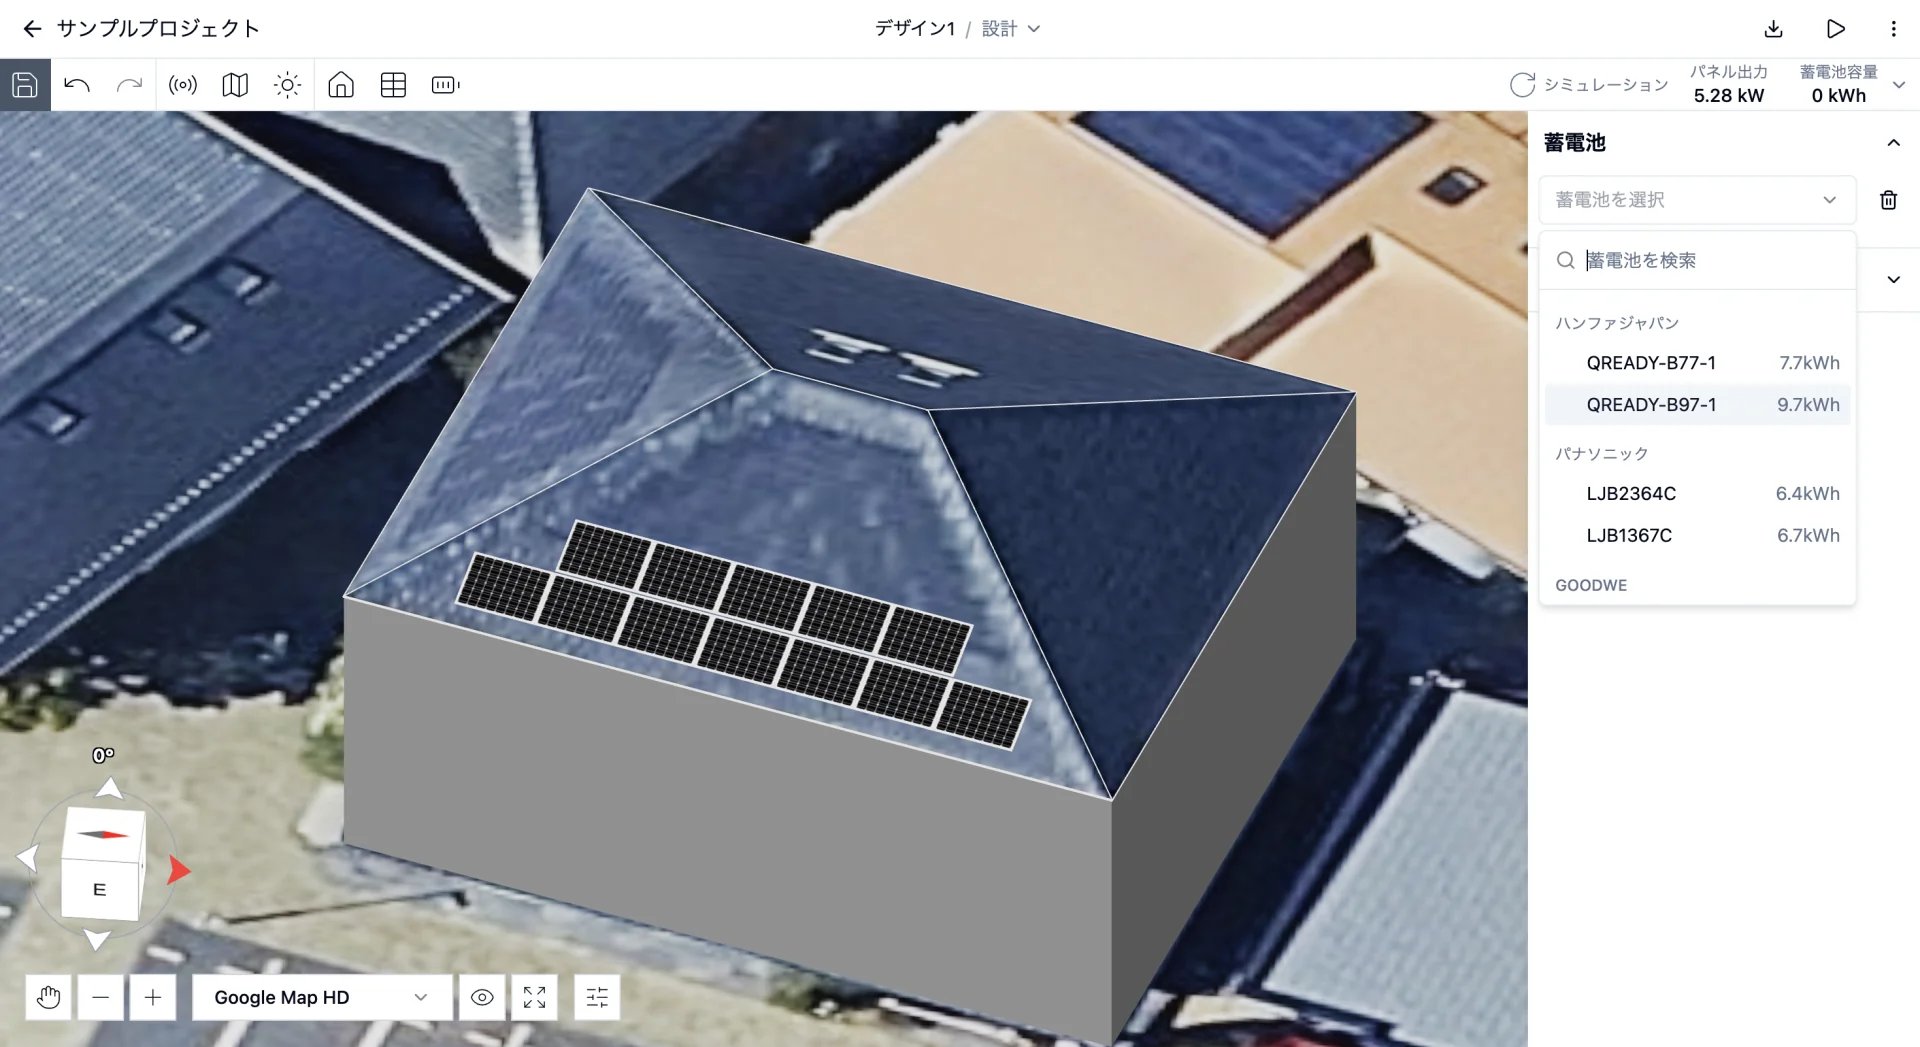
    設置する蓄電池を選択します。パワーコンディショナを選択すると、太陽光パネルとの接続も確認できます。

    <img src="https://mintcdn.com/bilopt/ep8fOEThysbr4EFT/images/help/getting-started/tutorial-06.webp?fit=max&auto=format&n=ep8fOEThysbr4EFT&q=85&s=33d82fa8a84f015d422da246732d74f5" alt="メーカーと定格容量から蓄電池を選択するリストを開いた画面" width="1920" height="1047" data-path="images/help/getting-started/tutorial-06.webp" />

    <RelatedLink title="蓄電池を選択する" href="/design/select-battery" />

    <RelatedLink title="パワーコンディショナを選択する" href="/design/select-power-conditioner" />
  </Step>

  <Step title="シミュレーションを実行する">
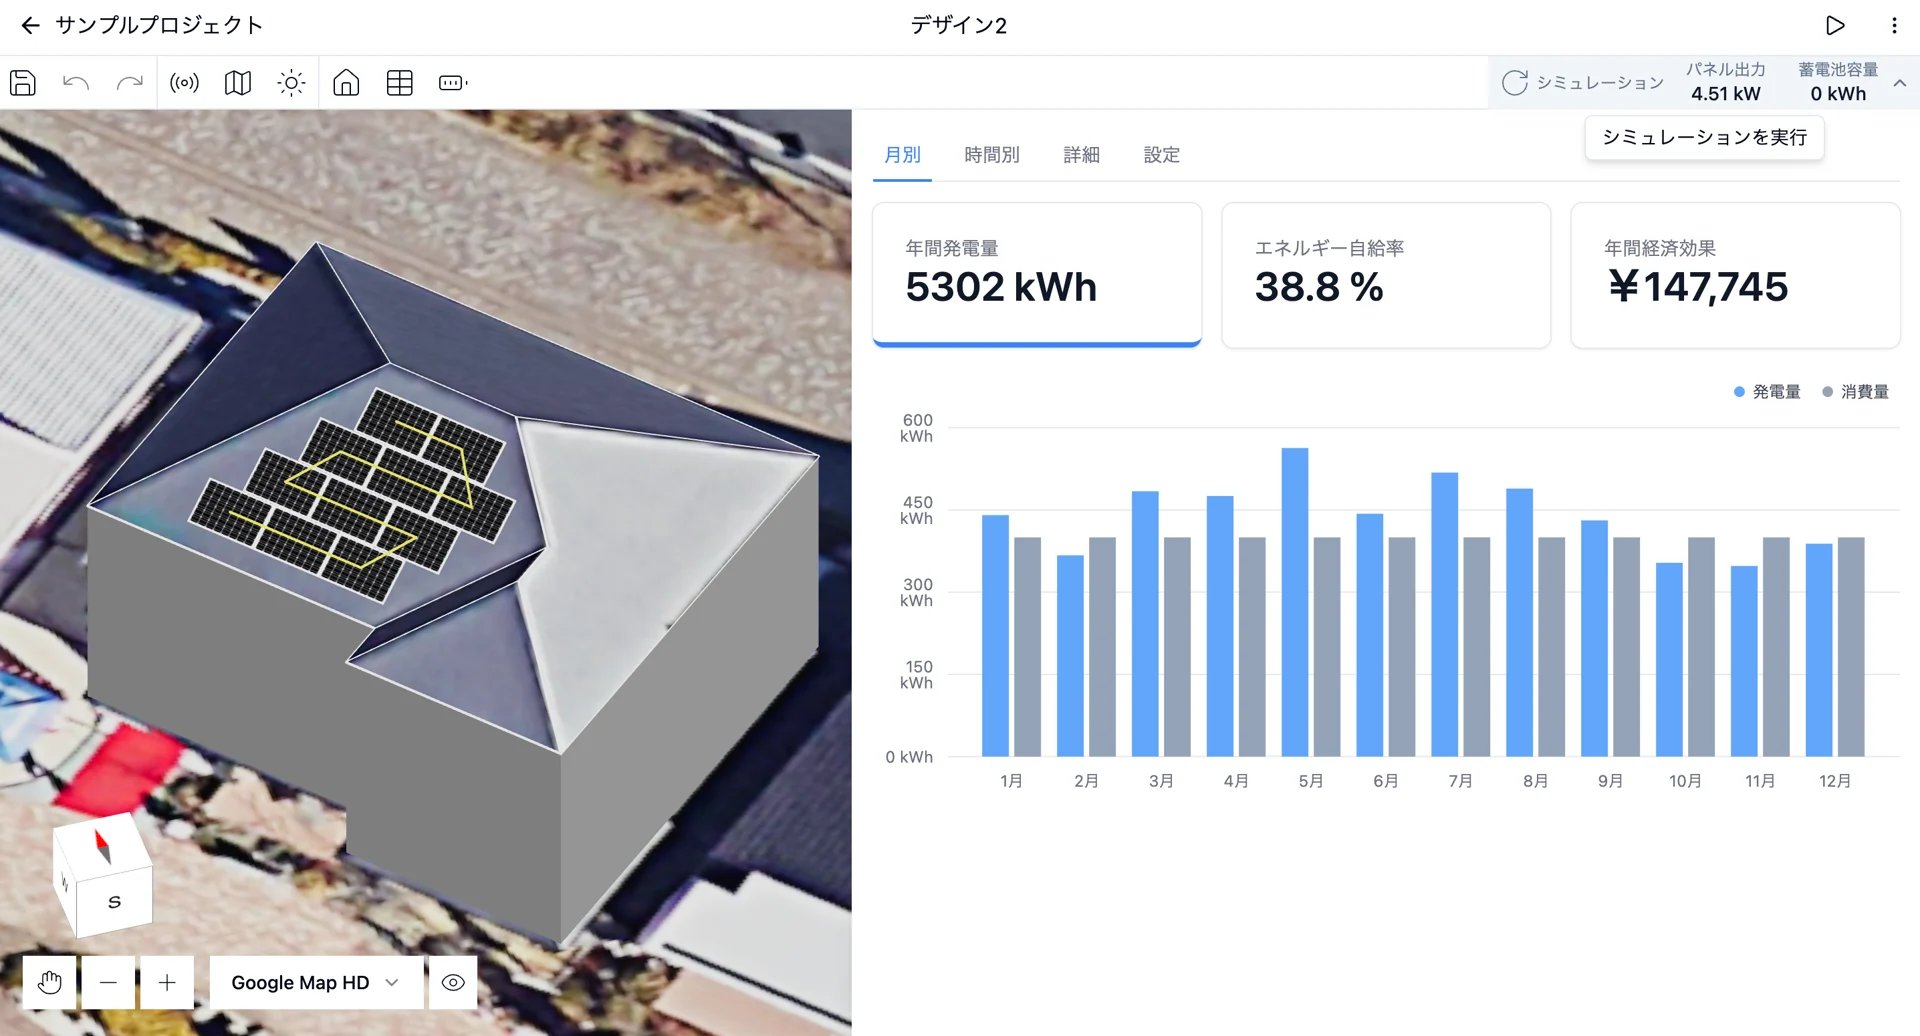
    発電量と経済効果をシミュレーションできます。影や反射光の影響も3Dで確認できます。

    <img src="https://mintcdn.com/bilopt/ep8fOEThysbr4EFT/images/help/getting-started/tutorial-07.webp?fit=max&auto=format&n=ep8fOEThysbr4EFT&q=85&s=5d9b7e5a7c31e19233874a6884b9b6e7" alt="年間発電量、エネルギー自給率、年間経済効果を表示したシミュレーション結果画面" width="1920" height="1036" data-path="images/help/getting-started/tutorial-07.webp" />

    <RelatedLink title="発電シミュレーションを実行する" href="/simulation/run-generation-simulation" />

    <RelatedLink title="影シミュレーションを実行する" href="/simulation/run-shadow-simulation" />

    <RelatedLink title="反射光シミュレーションを実行する" href="/simulation/run-reflection-simulation" />
  </Step>

  <Step title="提案資料を出力する">
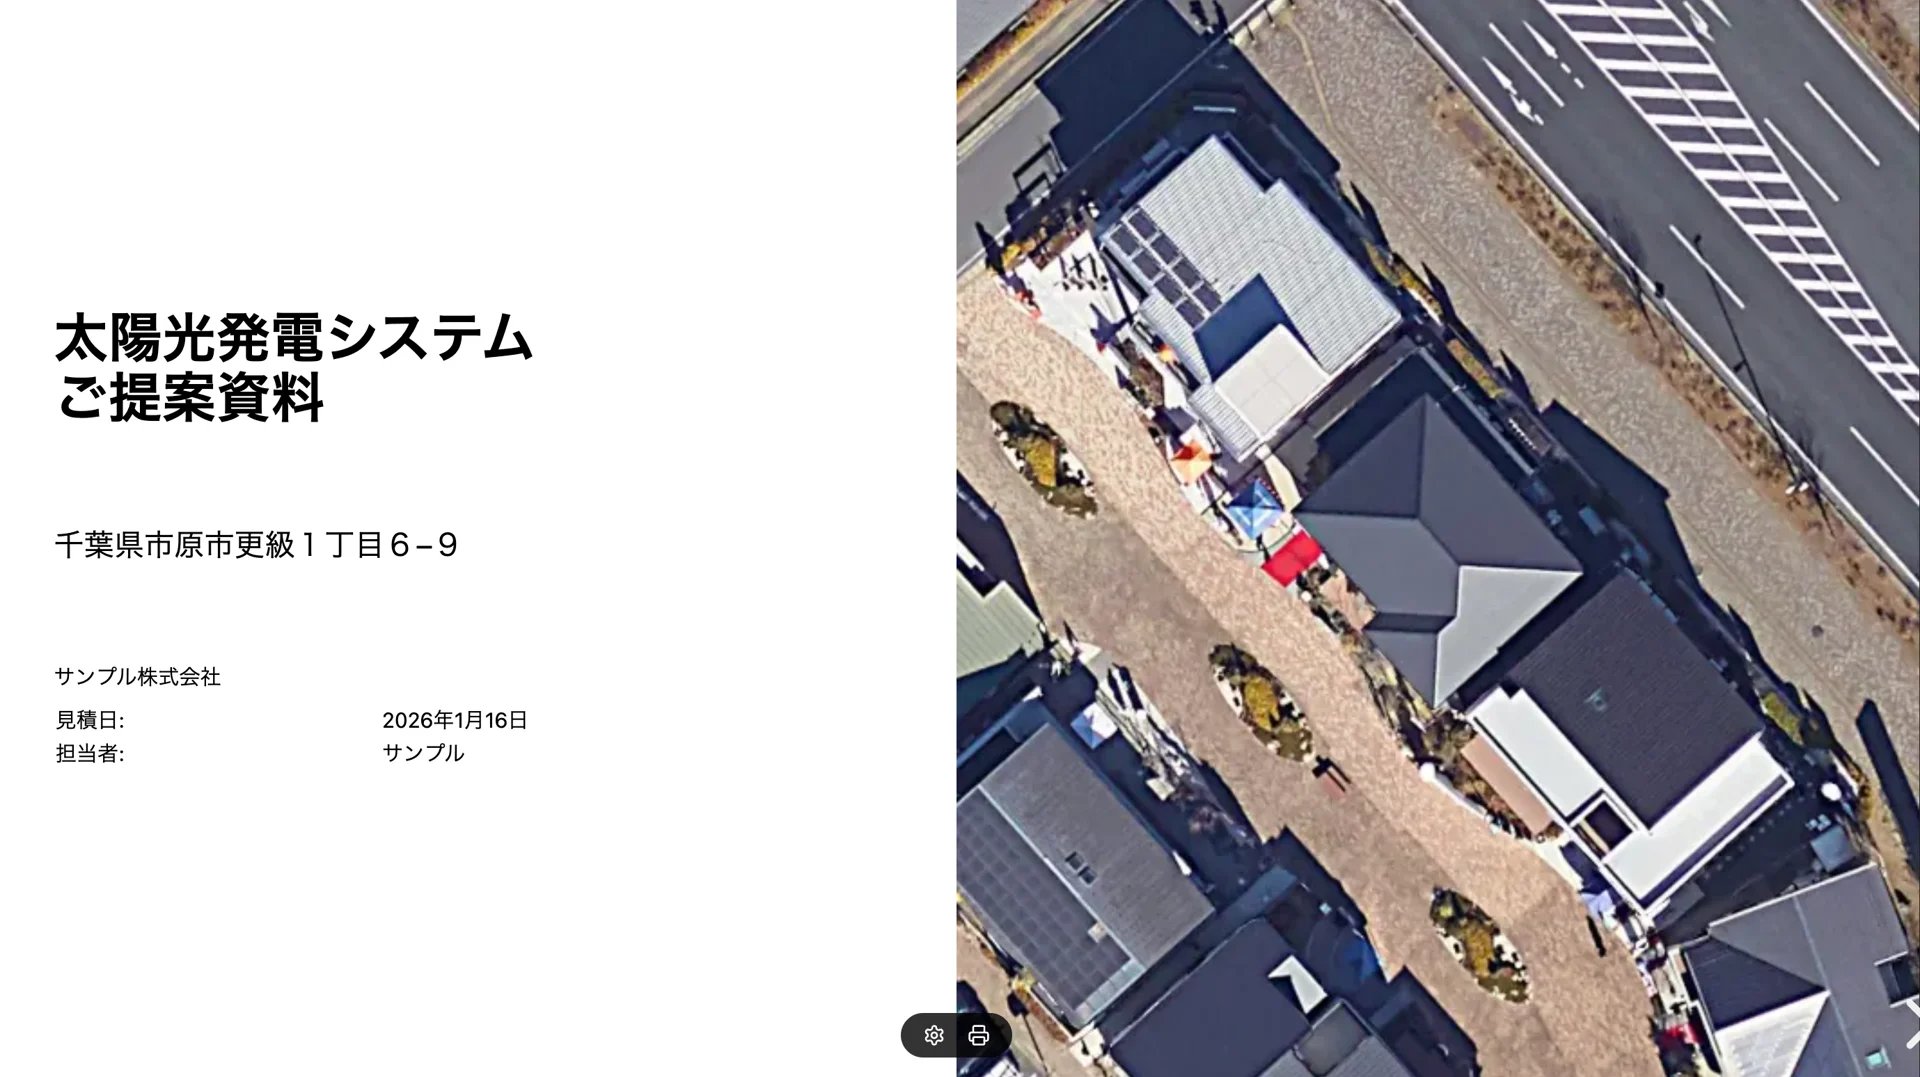
    設計結果をスライド形式で出力します。見積や補助金を入力し、PDFとして保存できます。

    <img src="https://mintcdn.com/bilopt/ep8fOEThysbr4EFT/images/help/getting-started/tutorial-08.webp?fit=max&auto=format&n=ep8fOEThysbr4EFT&q=85&s=4263969c4c1bf44a57775559d57610bb" alt="スライド形式で表示したお客さま提案資料の1ページ目" width="1920" height="1077" data-path="images/help/getting-started/tutorial-08.webp" />

    <RelatedLink title="提案資料を出力する" href="/output/export-proposal" />
  </Step>
</Steps>


This documentation is built and hosted on [Mintlify](https://mintlify.com), a developer documentation platform.